Topper Siggy Tut
4-4-03
**..Topper Siggy Tut..(Cont.)**
by Robyn PSP 7
Beginner (?)

Page 2..
21- Go to 'Effects/3D Effects/Inner Bevel' and use the following settings:
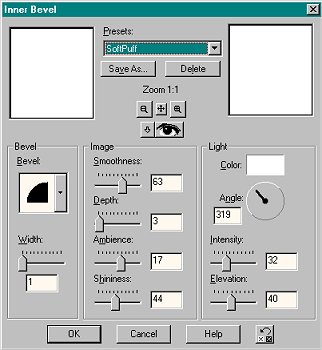 ***Tip..If you'd like to save this as a 'Preset' for future use, just click on 'Save As' and give it a name. You can see that I've named it SoftPuff. When ever you play around with settings and find something you like, be sure to give it a name and save it!
Click 'Ok' and Selections/Select None.
22- Go to 'Edit/Copy', then click on your New Image and go to 'Edit/Paste as New Layer. Add the same Drop Shadow as in #5. You now have all three pieces on their own layer and can move them where you want them to be. Place your name in line with your top piece so that no space is showing and it's centered.
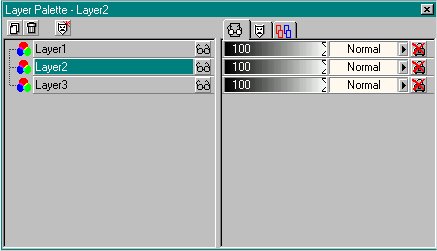
23- Open your 'Layer Palette' and put the layers in order so they are from top to bottom- 1,2, and 3. To move a layer up or down just click and hold it while moving it, (drag and drop).
*Layer Palette*

 24- Now you only have to use your 'Mover Tool' to arrange your three layers. Make sure it looks even .
25- Go to 'Layers/Merge/Merge Visible'.
(***Note: If you want your siggy to look like the one above, with a bordered background, just add another raster layer, floodfill it with a background color, move it to the bottom of the other layers on the layer palette, and add another border. Then Layers/Merge/Merge All and save as a .jpg.)
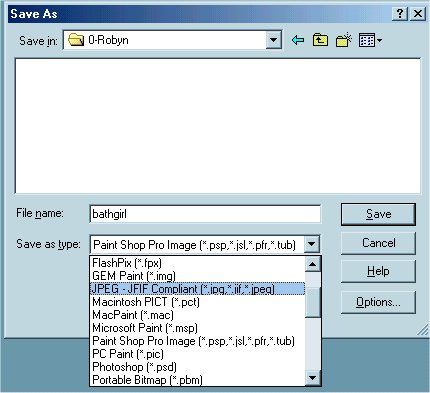
26- Edit/Copy, Edit/Paste as New Image. Now you have no wasted space around your new topper siggy. You can close the other images since you won't need them any more. I saved my 'Name' as a separate siggy, so you can do that now if you want to. Just click on your Name to make it active... go to File/Save As, and make sure you save it as a .jpg.
*Saving as a .jpg*
 This was from a different tut, but you can see how it works lol
**..Now we need to save your Topper siggy in Animation Shop..**
27- Save your topper siggy in a 'Temporary Folder' so you can find it when we open Animation Shop.
28- Open Animation Shop. You can click on this  if you have it on your toolbar...or go to 'File/Jasc Software Products/Launch Animation Shop'.
29- Go to 'File/Browse' and find your topper siggy. Double Click on it to open it.
30- Go to 'File/Save As'... give your siggy a name, save it in your siggy folder, and close your image. It'll be in your siggy folder when you're ready to use it.
***Tip: If it changes and doesn't look right after saving it, go to
'Edit/Undo Optimize Animation'. Check your Optimization settings and make sure they match these.... Optimization Settings...Then try again!
Ok, that's it! I hope you didn't have any problems...if you need help or if I left something out please email me!
***..Special Thanks to my 'Testers' , Kylee and Monique..***
They did a great job! Here's their results....

 Here's the 'Prezzie' that Katty made for everyone who did her tutorial, so I'm showing off my little reward too! :o)
Hugs...and Thanks Katty!

Page 1
Robyn's Tut'z
Home