Page 2


Adding Text to Tubes
by Robyn :o)   *PSP 7*


Making a Siggy with just a Tube n' Text


  11. Your text tool is the big black 'A' on your toolbar. Click on it, click on your image, and the text box will open.

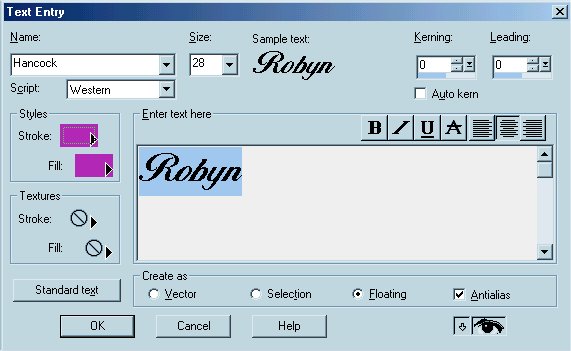
Now the fun of picking which font to use!  
  TIP: All the fonts installed on your computer automatically show up in your PSP program, and you might want to go 'Font Shopping' so you'll have a variety! The font sites tell you how to install them, or you can save them in a folder. When you open a font and minimize it, you can use it as if it's installed, but you won't be bogging down your computer with too many installed fonts, just close it when you're finished and it's there for next time! Neat Tip!  :o)

I have my font picked out and have experimented with the size, so I have what I want.
TIP: The 'Dropdown Menu' on 'Size' only goes up to 72, but you can type in any size you want, just erase what's in there and type any number you may need, you don't need to use the numbers shown unless you want to.
Ok, use the other settings I have. Make sure that 'Floating' and 'Antialias' are both checked. Click 'ok'.
You see my name in the center with the 'ants marching'. You can move your text any where you want to put it "BUT" make sure to move your cursor around on the text until you see this little goodie , it looks like the mover tool and that's just what it does. If that isn't showing you'll add your text again! (If that happens, just go to Edit/Undo Text and try again.) Move your text where you want it. You'll need to add your 'Drop Shadow' again, Effects/3D Effects/Drop Shadow.
On mine I raised the number on the 'opacity' to give my name a darker outline. Use my settings, or experiment with your own . Click 'Ok'.
We're making this simple so that's all we'll add this time.
Go to 'Selections/Select None' and we're finished with our text.

 Now to get rid of the excess space around our new 'siggy'!
Go to 'Edit/Copy', then 'Edit/Paste as New Image'. There you have it! Close out the old image and don't save changes.
We don't want a white background or it'll look like this 
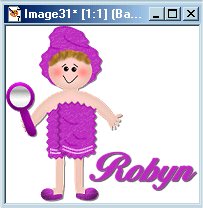
and can only be used 'on' white backgrounds, so we're going to make it transparent. We need to take our siggy to Animation Shop to do that...it's the only way I know of to 'save transparent'. Save your siggy in a temporary folder, I always keep a PSPTemp folder in My Documents.
Go to 'File/Save As' and find your folder. Save your siggy as a tube for now. You'll see the dropdown menu and notice all the ways of 'saving'. A tube can be saved as .psp or .tub, as well as other file names. Just type in your siggy name and click 'save'.
Close your image.

Open Animation Shop...
In AS go to 'File/Open', and locate your PSPTemp folder. Click on your siggy name
and 'Open'.
Go to 'File/Save As' (You need to have a folder to save all your siggies in so go to
that folder.) Type in the name you want to give this siggy and click 'Save'.
Your Optimization Box will open--just follow the settings I'm showing you!
Click on 'Customize'---
Use these settings for 'Colors':

Click on the 'Optimizations Tab' and use these settings:

Click on the 'Partial Transparency Tab' and use these settings:

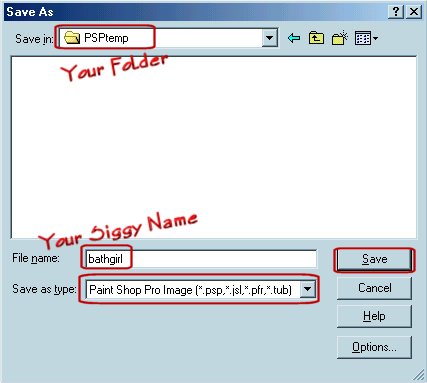
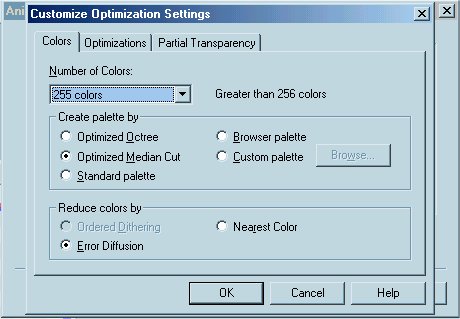
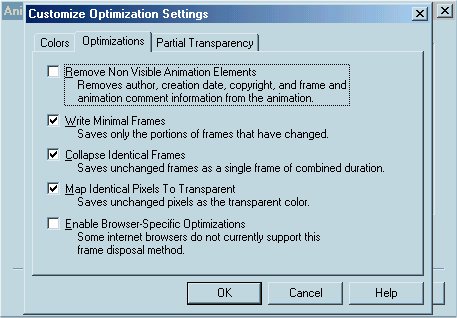
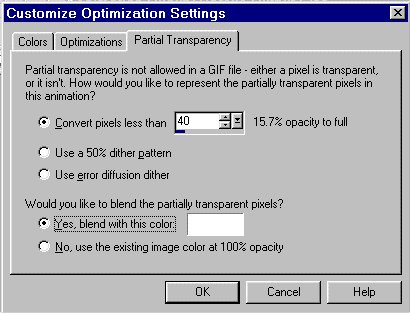
Click 'Ok', and just keep clicking 'Next' and finally 'Finish'.

ALL DONE!!
Close your image and it can be found and ready to use in your siggy folder!
If you have any problems my email addy is on the index page and I'd be more than happy to help you!
If you'd like to make your own 'Bathgirl' here's the link for it:
BathGirl Tut
Thanks for doing my Tut, and I hope you enjoyed learning a few little tips along the way... .
Hugs!


Page 1

Robyn's Tut'z    Home