
 ...by Robyn
I found this alphabet while browsing around and just fell in love with it.
 The site said the alphabet was free, so "Thank You Kevin"!
  My big problem was I couldn't figure out how to put it together!
It's fairly easy when all the letters are the same size and using the same frame speed,
but these are all different! Yikes...
I have a link to a site that has an animated alphabet tutorial but it's been closed lately.
I remembered how to do a regular animated alphabet and this is what I've come up with
for this 'different' one.
If anyone knows a better or easier way....PLEASE let me know! lol.
I owe a big Thank You to Katra, at Katra's KO-nceptions. I learned, from one of her tutorials, the 'drag' technique that you'll be using, and it makes things ohhhh so much easier! Please visit her site if you haven't already, her tutorials are fantastic!
OK! On with the tutorial...
You actually get 2 tutorials in 1 with this!
We'll start with an easy one so you can see how it works before we get into figuring the hard one. You can skip this if you want and just go on to the dollz alphabet, but a little practice is good, especially if you've never done this before :o)
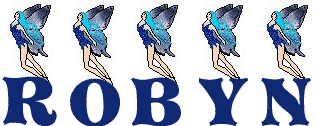
Here's an Animated Fairy Alphabet, also by Kevin. Each letter only has 2 frames and are all the same frame speed so there's not much figuring to do.
Download the Fairy Alphabet here:
Fairies
Download the Animated Dollz here:
Dollz
1. Open the letters you need in Animation Shop. You need to figure the size of the new blank image you'll need for your name. These frames are 65 x 127. Since my name has 5 letters I'll times that by 65 to get the width I need, which is 325. You can give yourself some extra room and crop later so I'll open a new image 350x127, which is how high the alpha frames are. The trick to this is that you need the same number of new frames as there are in the alphabet, not how many frames you have in your name. These have 2 frames so duplicate your new image once so you'll have 2 frames too. The 2 frames in the R will go into the 2 frames of my new Image.
2. Click on the 'first frame' of your new image and Edit/Select All. Then click on the 'first frame' of the fairy letter and Edit/Select All. Use keyboard shortcuts if you want. It's important to be sure you click on the 'first frame' of each. With your cursor (NOT the mover tool), click on the first frame of the fairy and 'Drag' her into the first frame of your new image. Be sure to have her in the exact position you want her in and let up on the mouse.
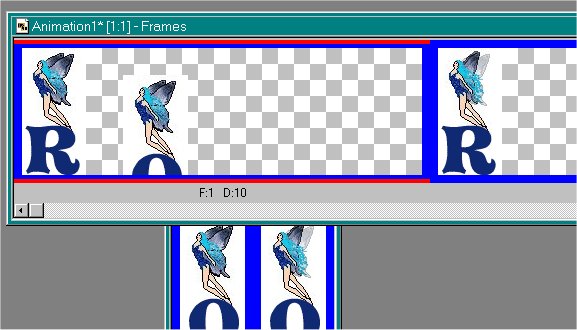 The fairy will show up in your two frames and the frames you dragged her from will be empty. Close the empty frames and continue with your second letter.
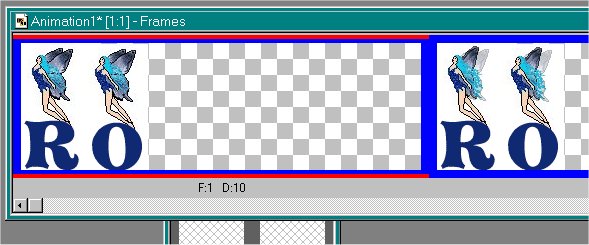
3. Continue with the rest of your letters and closing the empty frames until you have your complete name in the new frames.

4. Now you're ready to crop if you need to.
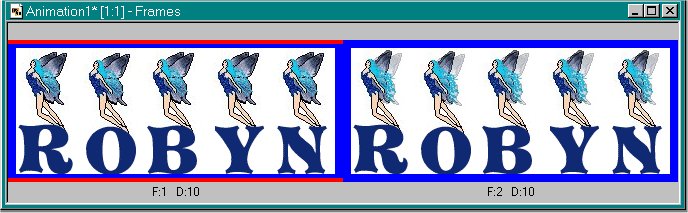
5. I've cropped my image and it's ready to animate and save! You'll need to slow down the animation, so click on Edit/Select All, and then Animation/Frame Properties. I set mine at 25. If you don't have a View Animation button showing, go to View/Animation, and then File/Save As. You have your animated Fairy Tag!
Now, for the hard stuff! lol. We'll start on a new page.
Page 2!!
Robyn's Tut'z