With the holidays over, for now lol, and all the picture taking going on, I suddenly thought how it drove me crazy that I had found some really pretty frames on websites but didn't know how to get my pictures into them! Being a newbie I had to ask around and someone finally told me. I never have found a tut for it so I thought I'd write one  it's really easy to do.
Ok here we go...
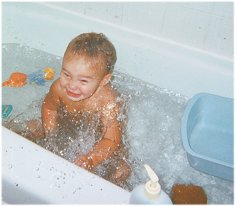
Have a copy of your picture and the frame you're going to use open in PSP.
1. Open a new image 450x400, or larger if you want :o)
2. Click on your picture's top bar and Edit/Copy. Click on the blank image's bar and Edit/Paste as new layer.
3. Do the same with your frame.

4. With your Mover Tool position your photo where you want it inside the frame.
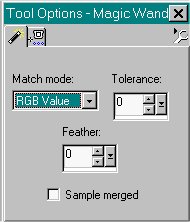
5. When you get your picture where you want it, make sure the 'Frame' layer is active and use your magic wand with the following settings:
Click inside the frame and apply the following Cutout. Effects/3D Effects/Cutout:
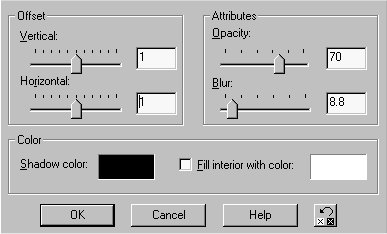
Repeat the cutout with a 'minus' 1 on the Vertical and Horizontal.
You can adjust the Blur and Opacity if you'd like. The settings depend on the type of picture and frame you have. Deselect. (Selections/Select None)
There's lots to play with here, explore different settings that you might like better for your particular frame and picture.
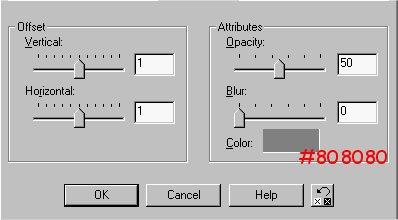
6. Apply a Drop Shadow now. Effects/3D Effects/Drop Shadow, with the settings below:
7. **Make sure your 'Frame' layer is on top and click on that layer to make it active.**
8. Use your Magic Wand with the same settings as above and click anywhere outside your frame/picture. The marching ants will be around the frame and the images outside borders.
While it's selected go to Merge/Merge Visible, then hit Delete on your Keyboard.
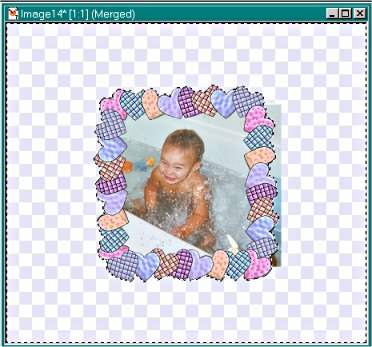
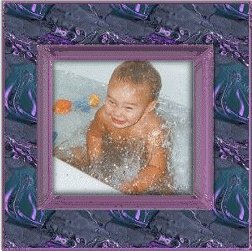
The excess part of your picture will be gone and you'll have your picture framed. Do not deselect.
9. Click on Selections/Invert and apply the following Drop Shadow. Effects/3D Effects/Drop Shadow.
10. Go to Edit/Copy, Edit/Paste As New Image, and all the extra space is gone.
11. The way I do the rest is to save the framed photo in a temp folder, open Animation Shop, open your picture, and 'Save As'. Name it what you want and you're finished :o)